Product

Introduction
My project uses the Particle Photon, an inexpensive programmable Wi-Fi development board that I am very fond of. The Photon runs C++ on its micro operating system, and communicates with Particle’s servers to create a low cost, high power device. Code can be uploaded to the Photon in several ways. Flashed from the Particle.io web IDE, uploaded from either the Particle DEV IDE or the Particle CLI tool, or compiled locally and flashed over USB with DFU-util.
My product was originally designed to be a kit for students at any age who are interested in technology or robotics. Its purpose was to create a robot front end for the Photon that will get people excited to program and create things with. It gives a reason for people to become interested in the Internet of Things by creating an exciting interactive experience.
Planning
My finished timeline can be found on Google Drive.
Hardware
My project uses many components and several custom designed PCBs. I have made several versions of the main PCB, each one with fixes and corrections from the last. Below is a representational image of the PCB, and an image of the Photon and Arduino pins used by the PCB.

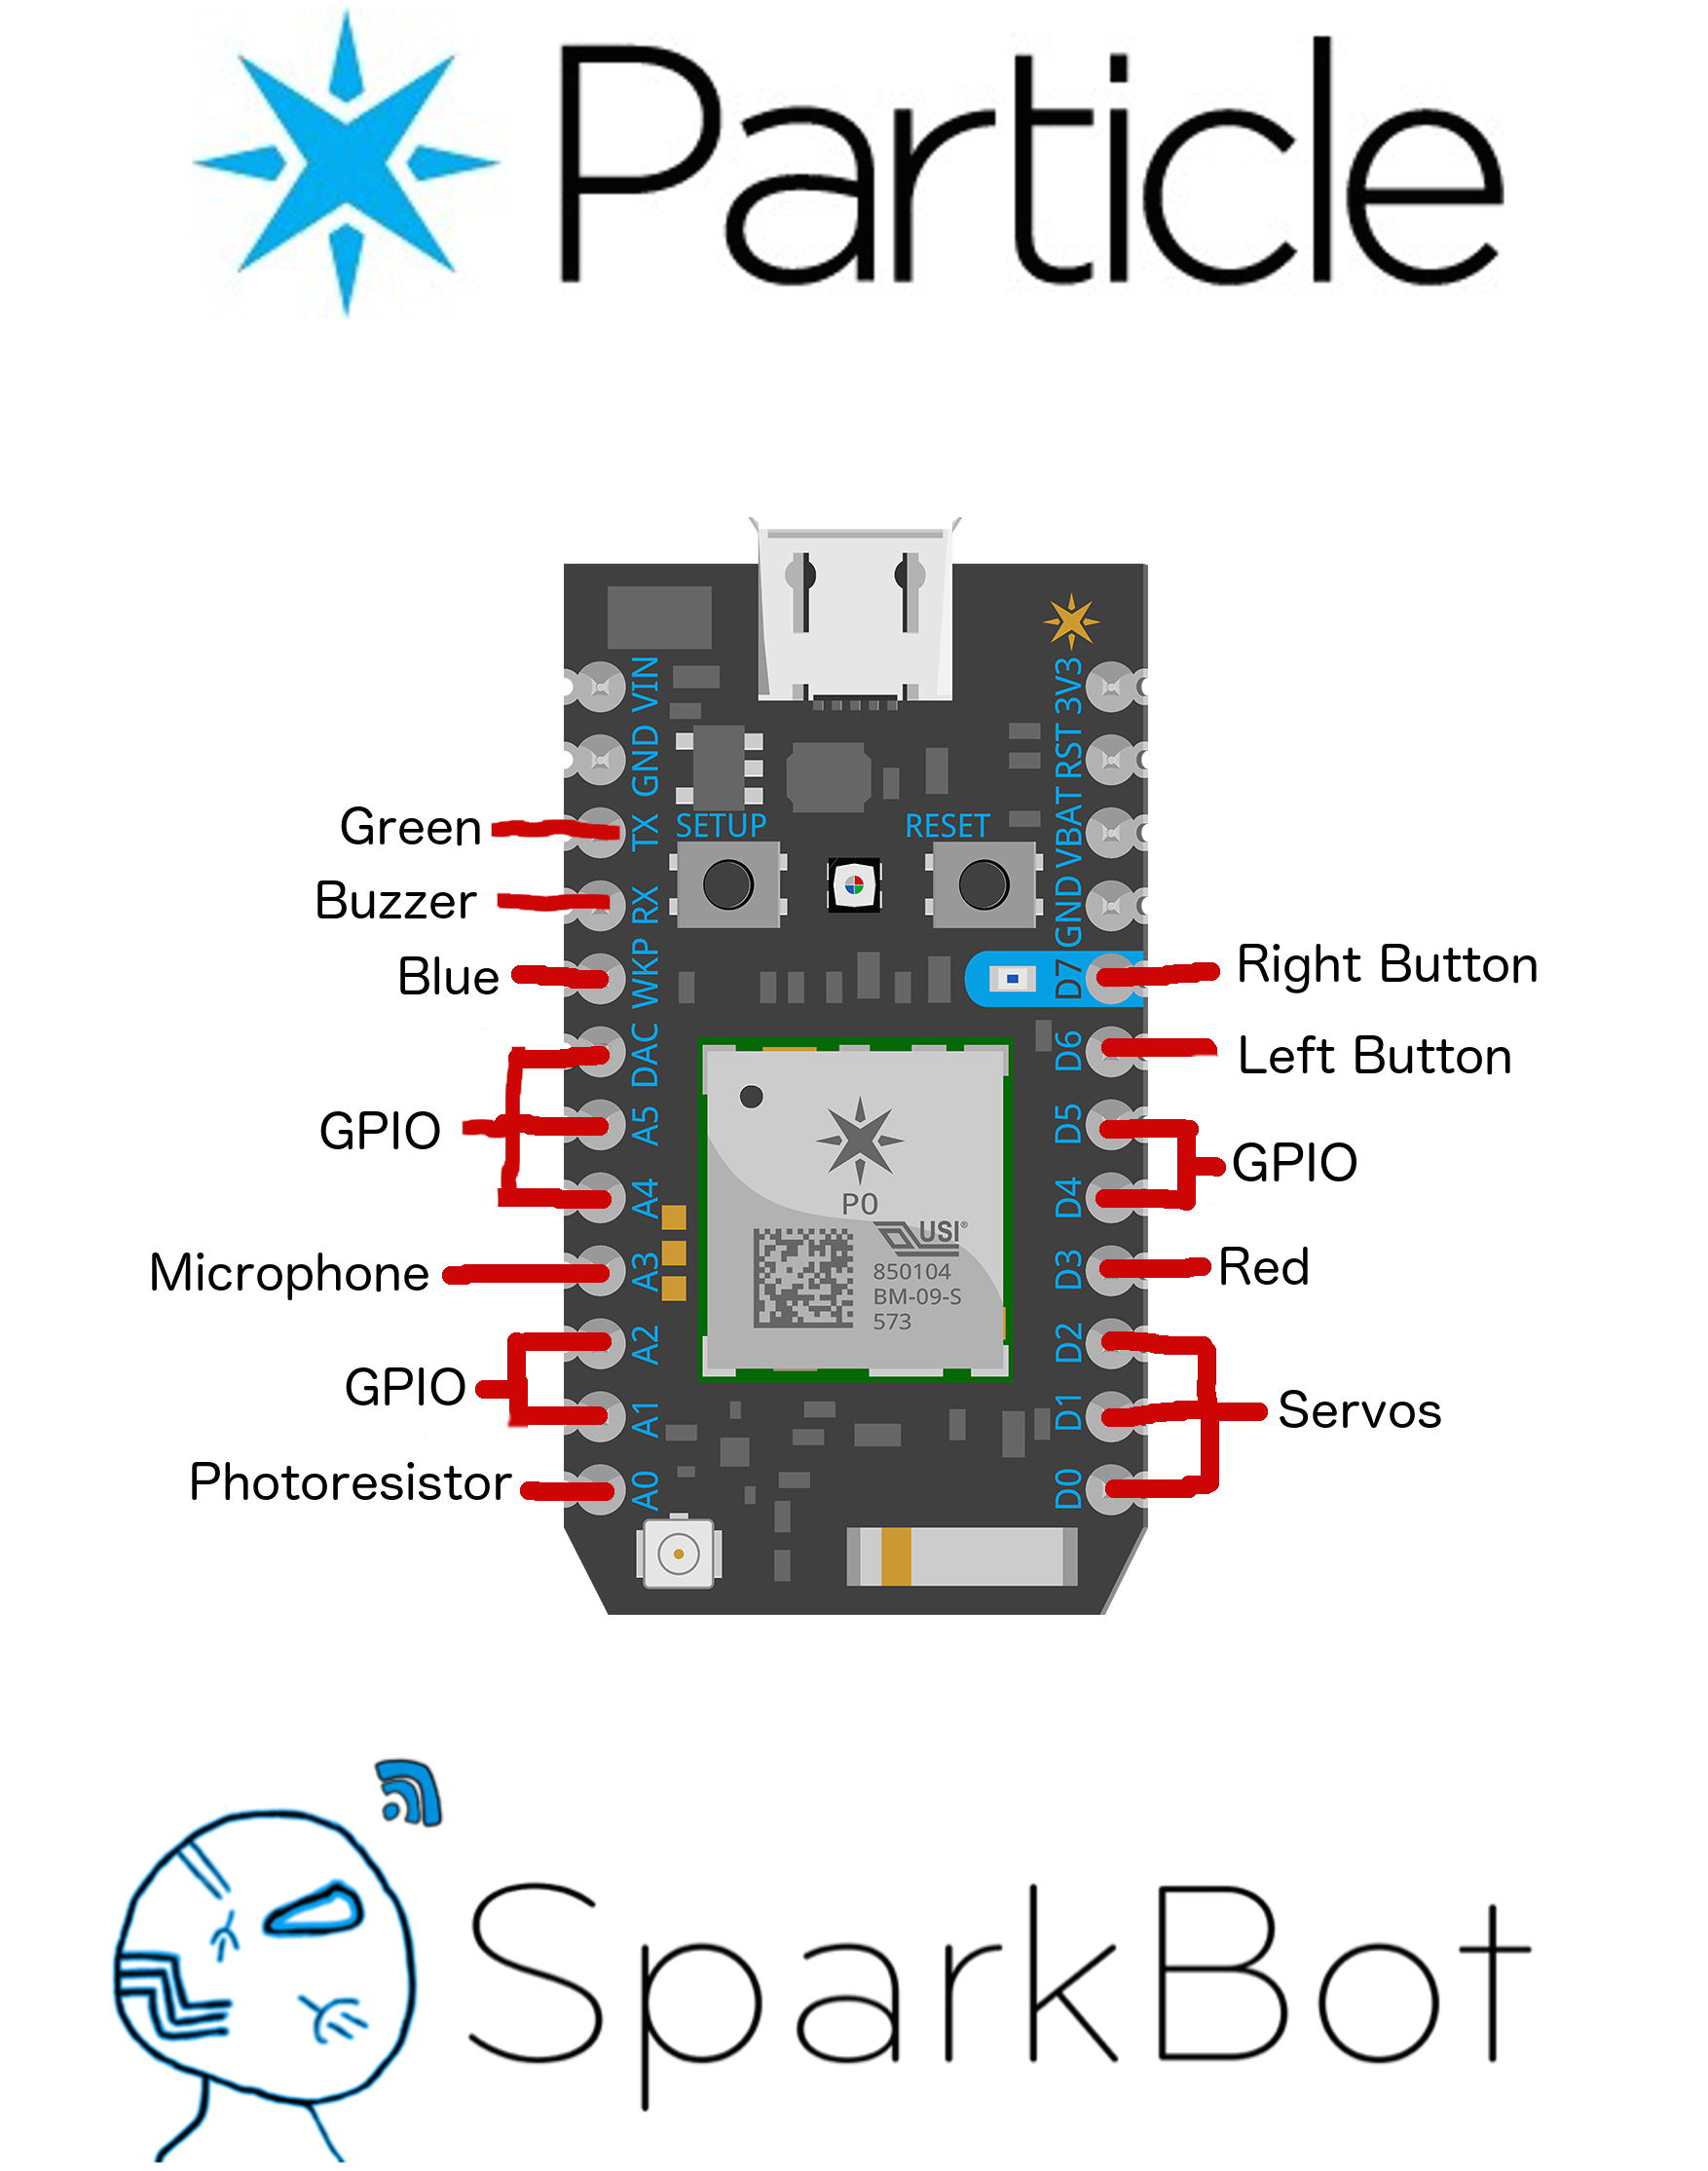
The shield PCB makes use of most of pins of the Photon, allowing it to work with the sensors, servos, buttons and lights on a my product. This PCB was developed using Fritzing. Pictured above is the final version of the PCB. There are several free pins that can be programmed freely to work with other components so my product can use parts on a breadboard without the Photon needing to be taken out its socket.
Getting a perfect pinout was difficult because of the limited number of PWM pins and analog pins. The pins are all over the place, but are organized in my library with constants for the pins.

Code
I have developed a C++ library that makes using and programming my product simpler and more convenient.
Below is the barebones code to use my library.
#include "application.h"
#include "sparkbot-default.h" // Import the sparkbot-default library.
SYSTEM_THREAD(ENABLED);

sparkbot sb; // Create sb, an object of the sparkbot class.

void syncServosHandler(const char *event, const char *data)
{
  sb.syncServosSlave(event, data);
}

void RGBSlaveHandler(const char *event, const char *data)
{
  sb.RGBSlave(event, data);
}

void setup() // Mandatory setup function.
{
  sb.begin();
  interrupts();
  Particle.subscribe("syncServos", &syncServosHandler, MY_DEVICES);
  Particle.subscribe("RGB", &RGBSlaveHandler, MY_DEVICES);
}

void loop()
{
  sb.refresh();
}
Open Source
My product respects and uses many open source technologies and services. All of the software sources and hardware files can be found freely on GitHub.

SparkBot by Nathan Robinson is licensed under a Creative Commons Attribution-NonCommercial-ShareAlike 4.0 International License.
Based on a work at https://github.com/nrobinson2000/sparkbot.
To help with the development of my product you can either donate bitcoin or contribute to my GitHub repositories. If you wish to suggest something for this page or correct anything you can edit this page on GitHub.
If you want to contribute to my source code you can fork my repositories.
$ git clone https://github.com/nrobinson2000/sparkbot-default.git

$ git clone https://github.com/nrobinson2000/sparkbot.git
Repositories
My project is organized into three repositories. One for the C++ library and Photon code, one for the designs and Arduino Nano code, and another for this website.
C++ Library and Photon Code
Designs and Arduino Code
Website
Components
- 1x Particle Photon and Micro USB cable
- 1x Arduino Nano and Mini USB cable
- 1x Microphone
- 1x Photoresistor
- 1x RGB LED
- 1x Button
- 1x Piezo Buzzer
- 1x Blue LED
- 3x Servos
- 2x 12 Pin Header
- 2x 15 Pin Header
- 1x 9 Pin Header
Using IFTTT with my product
IFTTT, (if this then that) is a website that allows web services to send data between each other in a user-friendly way. Below is a tutorial on how to setup IFTTT on a Photon.
How to use webhooks with a to communicate with IFTTT and control anything:
Note: You must have a Photon already set up and be logged into Particle CLI on your machine.
- Step 1: Create an IFTTT account
- Step 2: Create a recipe that uses the Maker channel trigger or use the recipe below to control a Wemo switch. Name the event wemo.
- Step 3: Create a .json file for the webhook. Name the file wemo.json
{
  "eventName": "toggleWemo",
  "url": "https://maker.ifttt.com/trigger/wemo/with/key/[PUT YOUR IFTTT KEY HERE]",
  "requestType": "GET",
  "mydevices": true
}- Step 4: Upload the webhook to the Particle cloud
$ particle webhook create wemo.json- Step 5: Toggle the Wemo switch from your code!
Particle.publish("toggleWemo");Criteria:
Criterion 1: My product must be an interactive IoT demonstration with its own custom designed PCB.
Criterion 2: My product must educate people on the Internet of things.
Criterion 3: The product must connect to wi-fi and have a functioning web app.
Criterion 4: My product must run C++ on the Photon and Arduino Nano.
Criterion 5: My product must be easy and entertaining to use.